How to Monitor Cameras with TP-Link Tapo App: Step-by-Step Guide
Smart home technology is rapidly changing the way we monitor and secure our living spaces. One of the key components of any smart home setup is security cameras. TP-Link's Tapo cameras are popular for their affordability, ease of use, and advanced features, offering everything from live streaming to motion detection and cloud storage options. The TP-Link Tapo app provides an intuitive way to monitor and control these cameras remotely, ensuring you stay connected to your home no matter where you are.
In this detailed guide, we’ll walk you through everything you need to know about using the TP-Link Tapo app to monitor your cameras. From initial setup to advanced monitoring features, you’ll learn how to get the most out of your Tapo security cameras using the app on your smartphone or tablet.
What is TP-Link Tapo App?
The Tapo app is a free mobile application developed by TP-Link to control and manage its Tapo series of smart devices. Available for both Android and iOS, the app is designed to give you complete control over your Tapo devices, including cameras, plugs, lights, and more.
For camera monitoring, the app enables users to:
View live video feeds from their Tapo cameras in real time.
Access recorded footage from cloud storage or an SD card (depending on the camera model).
Control camera settings such as motion detection zones, night vision, and camera angles (for PTZ models).
Set alerts and notifications for motion detection and other triggers.
With the Tapo app, you can monitor multiple cameras, create automated routines, and stay informed about your home security with ease, all from the convenience of your mobile device.
Why Use TP-Link Tapo Cameras for Monitoring?
TP-Link's Tapo cameras are designed to offer high-quality security at an affordable price. Some of the standout features that make Tapo cameras a popular choice include:
High-Resolution Video: Tapo cameras provide up to 1080p Full HD video quality, ensuring crisp and clear footage.
Night Vision: With infrared night vision, you can monitor your home 24/7, even in low-light conditions.
Motion Detection Alerts: Receive real-time notifications when motion is detected, ensuring you never miss any important activity.
Cloud Storage: With Tapo's cloud storage options, you can store recorded footage safely without worrying about space limitations on your devices.
Two-Way Audio: Some Tapo cameras come with built-in microphones and speakers, allowing for two-way communication through the app.
Remote Control: Whether you're at home or away, the Tapo app allows you to control and monitor your cameras remotely.
These features make Tapo cameras an ideal solution for anyone looking to enhance their home security with easy access and control through the Tapo app.
How to Set Up TP-Link Tapo Camera for Monitoring?
Before you can start monitoring your cameras with the Tapo app, you need to set them up. Here’s a step-by-step guide to get you started:
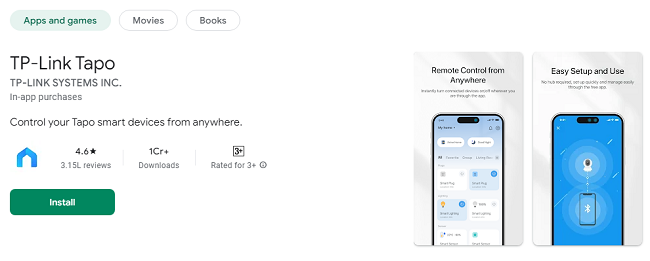
Step 1: Download and Install the Tapo App
Open the Google Play Store (Android) or the App Store (iOS) on your smartphone or tablet.
Search for “Tapo” in the search bar and select the official TP-Link Tapo app by TP-Link Technologies Co., Ltd.
Tap Install to download the app onto your device.
Step 2: Create or Log into Your TP-Link Account
Once the app is installed:
Open the Tapo app and sign in with your TP-Link account.
If you don’t have a TP-Link account, tap Create Account and follow the on-screen prompts to create one.
Step 3: Add Your Tapo Camera to the App
In the Tapo app, tap the “+” button to add a new device.
Select the Tapo camera model you want to set up (e.g., Tapo C200, Tapo C310, etc.).
Follow the on-screen instructions to put the camera into pairing mode. Typically, this involves plugging the camera into a power source and waiting for the camera’s LED indicator to start blinking.
Connect your smartphone or tablet to the same Wi-Fi network that you want your Tapo camera to connect to.
The app will prompt you to scan a QR code displayed on the camera (usually visible on the camera itself or in the manual) to complete the pairing process.
Step 4: Finalize Camera Setup
Once the camera is paired with the app, you’ll have the option to:
Set up a name for your camera (e.g., “Front Door Camera” or “Living Room Camera”).
Choose cloud storage options if you wish to store recordings in the cloud (requires a subscription).
Once completed, your camera will appear in the app’s dashboard, and you’re ready to start monitoring.
How to Monitor Your Tapo Cameras Using the App?
Now that your camera is set up, you can start monitoring it via the Tapo app. Here's how:
Step 1: View Live Video Feed
Open the Tapo app and select your camera from the app’s main screen.
Tap the Live View button to access the live video feed from your camera.
Use the controls within the app to zoom in/out, adjust camera settings, or change camera angles if your camera supports PTZ (pan-tilt-zoom) functionality.
Step 2: Use Two-Way Audio (If Supported)
Many Tapo cameras come with built-in two-way audio, allowing you to both listen and speak through the camera using your smartphone. To use this feature:
In the live feed view, tap the microphone icon to activate the audio feature.
Hold the microphone icon to speak through the camera.
Release the microphone icon to listen to audio from the camera.
This feature is especially useful for communicating with family members, pets, or visitors.
Step 3: Configure Motion Detection Alerts
The Tapo app allows you to configure motion detection settings, so you get notified whenever there’s movement within your camera’s field of view. To set up motion detection alerts:
Open the Tapo app and select your camera.
Tap the Settings icon (gear icon) and go to Motion Detection.
Enable Motion Detection and adjust the sensitivity to your preference.
Set the motion detection zones to specify which areas of the camera's view you want to monitor for movement.
Enable Push Notifications to receive alerts whenever motion is detected.
With motion detection alerts enabled, you’ll receive a real-time push notification on your phone, keeping you updated on any activity in your home.
Step 4: Access Recorded Footage
If your Tapo camera is equipped with an SD card or connected to cloud storage, you can access recorded footage directly from the app. To view past recordings:
Open the Tapo app and select your camera.
Tap the Playback icon to access the recorded footage.
Browse through the footage by selecting specific dates and times. You can view both continuous recordings and motion-triggered clips, depending on your storage settings.
Step 5: Adjust Camera Settings
You can further enhance your camera's functionality by adjusting its settings:
Night Vision: Turn on or off the night vision mode for clear footage in low-light conditions.
Recording Schedules: Set up a recording schedule to automatically start and stop recording at specific times.
Camera Rotation (PTZ): If your camera has pan-tilt-zoom (PTZ) functionality, you can control the camera's movement directly from the app.
Privacy Mode: Some Tapo cameras allow you to activate privacy mode, which turns off the camera’s feed and mutes audio for times when you don’t need to monitor the area.
Advanced Monitoring Features with TP-Link Tapo App
For those looking for more advanced features, the Tapo app provides additional functionality to make camera monitoring even more efficient:
1. Cloud Storage for Footage
If you want to save footage for longer durations, you can subscribe to Tapo Care, TP-Link's cloud storage service. This allows you to store videos remotely, access them from anywhere, and safeguard recordings from being lost due to SD card failure or theft.
2. Smart Integrations with Google Assistant and Alexa
The Tapo app supports voice integration with Google Assistant and Amazon Alexa, enabling you to monitor your cameras using voice commands. For example, you can say:
“Hey Google, show me the front door camera.”
“Alexa, show the backyard camera.”
3. Multiple Camera Setup
The Tapo app supports monitoring multiple cameras simultaneously. You can add several Tapo cameras to your account and view all of them on one screen. If you have multiple cameras at different locations (e.g., inside and outside), you can easily switch between live feeds without needing to open multiple apps.
Troubleshooting Common Issues with Monitoring Tapo Cameras
While using the Tapo app for camera monitoring is straightforward, you may encounter some issues. Here are some common problems and how to resolve them:
1. Camera Not Connecting to the App
Solution: Ensure the camera is properly paired with the app, and both your smartphone and camera are on the same Wi-Fi network. Restart your router or the camera if necessary.
2. Live Stream Lagging or Freezing
Solution: Check your internet speed. A slow Wi-Fi connection may cause lag. Try restarting the camera and your router to improve performance.
3. Motion Detection Alerts Not Working
Solution: Make sure motion detection is enabled in the app’s settings. Adjust the sensitivity and motion zones to improve accuracy.
Conclusion
Monitoring your home’s security cameras using the TP-Link Tapo app is a simple, effective way to stay connected and protect your property. The app’s intuitive interface allows you to view live video feeds, access recorded footage, receive alerts, and adjust camera settings all from your smartphone or tablet. With advanced features like cloud storage, two-way audio, and integration with Google Assistant and Alexa, the Tapo app provides a powerful tool for managing your smart home security.
By following the steps in this guide, you’ll be able to set up your Tapo cameras, configure them for monitoring, and enjoy peace of mind knowing you can monitor your home anytime, anywhere.
Updates