TP-Link Tapo - Download on Your Android & iOS Devices
In today’s fast-paced world, smart devices are becoming an integral part of our daily lives. From enhancing home security to automating various tasks, smart devices like cameras, plugs, and lights have revolutionized the way we manage our homes. TP-Link’s Tapo series offers a wide range of smart home devices that can be easily controlled via the Tapo app. Whether you have a security camera, smart plug, or smart lighting, the Tapo app allows you to manage all your devices from anywhere with an internet connection. This guide will walk you through how to download, install, and use the TP-Link Tapo app on both Android and iOS devices.
What is the TP-Link Tapo App?
The Tapo app is a mobile application developed by TP-Link to control and manage Tapo smart home devices. The app allows you to easily set up, control, and monitor your devices from anywhere. Whether you want to turn on a light, check your home’s security cameras, or set a schedule for your smart plugs, the Tapo app puts all of these features at your fingertips. It also integrates with voice assistants like Google Assistant and Amazon Alexa, allowing for hands-free control.
Key Features of the Tapo App:
Remote control: Control your Tapo smart devices from anywhere using your smartphone.
Voice control: Integrates with Amazon Alexa and Google Assistant for voice commands.
Automation: Set schedules, timers, and away modes for your devices.
Family sharing: Invite other family members to control devices through the app.
Live streaming: View live feeds from Tapo cameras directly within the app.
Customizable alerts: Receive notifications for motion detection or other triggers.
Steps to Download TP-Link Tapo App on Your Android & iOS
For Android Devices
If you’re using an Android device, downloading and installing the TP-Link Tapo app is straightforward. Here’s how to do it:
Step 1: Open Google Play Store
Unlock your Android phone and open the Google Play Store app.
Step 2: Search for Tapo App
In the search bar at the top of the Play Store, type “Tapo” and press enter. You’ll see a list of apps related to Tapo.
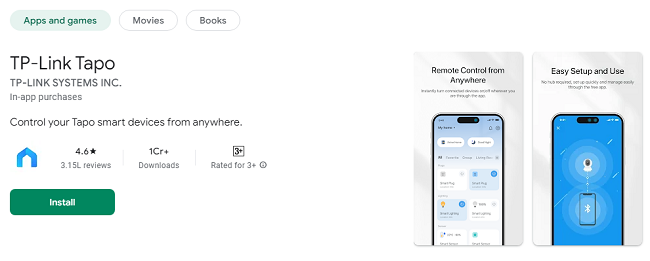
Step 3: Select the Tapo App
Look for the Tapo app by TP-Link Technologies Co., Ltd. The app icon will be a simple blue and white logo with the word "Tapo" written in it. Make sure you select the correct one.
Step 4: Install the App
Once you’ve found the Tapo app, tap on the Install button. The app will start downloading and installing on your device.
Step 5: Open the App
After installation, tap Open to launch the app. Alternatively, you can find the Tapo app icon in your apps menu.
For iOS Devices
If you have an iPhone or iPad, follow these steps to download the Tapo app:
Step 1: Open the App Store
Unlock your iOS device and open the App Store.
Step 2: Search for Tapo App
In the search bar at the bottom of the screen, type “Tapo” and press the search button.
Step 3: Select the Tapo App
Look for the Tapo app by TP-Link Technologies Co., Ltd. and tap on it. Ensure you select the official Tapo app.
Step 4: Install the App
Tap the Get button to download and install the app. You may need to authenticate your Apple ID or use Face ID/Touch ID to confirm the download.
Step 5: Open the App
Once the installation is complete, tap Open to launch the Tapo app. Alternatively, you can find the app on your home screen.
Setting Up Your Tapo Devices
After downloading and opening the Tapo app, you can begin setting up and managing your Tapo smart devices. Follow these steps to connect your Tapo devices to the app.
Step 1: Create a TP-Link Account
When you first open the Tapo app, you will be prompted to create a TP-Link account. This account is necessary for syncing your devices and managing them remotely.
Tap Sign Up to create a new account.
Enter your email address, create a password, and follow the on-screen instructions.
If you already have a TP-Link account, tap Login and enter your credentials.
Step 2: Add a New Device
Once you’ve logged into your TP-Link account, you can add a Tapo device to the app. The process may slightly vary depending on the type of device (smart plug, camera, light, etc.), but the general steps are similar.
Tap on the “+” icon to add a new device.
Select the type of device you want to add (e.g., Tapo Camera, Tapo Smart Plug).
Follow the on-screen instructions for your specific device. Typically, you’ll need to:
Connect your device to power.
Make sure your device is in pairing mode (usually indicated by a blinking light).
Connect your smartphone to the same Wi-Fi network that you want your device to use.
The app will guide you to complete the pairing process.
Once the device is connected, give it a name (e.g., "Living Room Camera," "Kitchen Light") and assign it to a room if you prefer.
Step 3: Control Your Devices
Once your device is set up, you can start controlling it through the Tapo app. Here are some common features:
Live View (for cameras): Tap on the camera icon to view the live stream.
Turn On/Off (for plugs, lights): Tap the power icon to control the device.
Schedules and Timers: Set up schedules to turn your devices on or off at specific times.
Automation: Use the “Automation” tab to create advanced routines, like turning on lights when motion is detected.
Step 4: Set Up Voice Control (Optional)
For hands-free control, you can link your Tapo devices to Amazon Alexa or Google Assistant.
For Amazon Alexa: Open the Alexa app, go to Devices, tap Add Device, and search for Tapo. Follow the instructions to link your TP-Link account.
For Google Assistant: Open the Google Home app, go to Add > Set Up Device, and link your TP-Link account.
Once linked, you can control your devices using voice commands like “Alexa, turn on the living room light” or “Hey Google, show me the front door camera.”
Useful Tips for Using the Tapo App
Away Mode: Use the Away Mode feature to simulate someone being at home by automatically turning your lights on and off at random intervals.
Push Notifications: Set up motion detection alerts for your cameras to receive push notifications when any activity is detected.
Family Sharing: Invite family members to control the devices by going to the Account section of the app and selecting Family Sharing.
Energy Monitoring: If you use Tapo smart plugs, check the energy usage of devices connected to the plug via the app for better energy management.
Troubleshooting Common Issues
If you run into issues while using the Tapo app, here are a few common troubleshooting tips:
Device Not Pairing:
Make sure your device is in pairing mode (usually indicated by a blinking LED).
Ensure your phone and the Tapo device are connected to the same Wi-Fi network.
Restart your router and try again.
Connection Issues:
Double-check that your Wi-Fi network is stable and has internet access.
If your device is far from the router, try moving it closer to improve the signal strength.
App Crashes or Freezes:
Try restarting the app or your smartphone.
Ensure your phone’s operating system is up to date and that the Tapo app is running the latest version.
Conclusion
The TP-Link Tapo app is a powerful and user-friendly tool for managing your smart home devices. By following the simple steps above, you can download and install the TP-Link Tapo app on your Android or iOS device and start controlling your Tapo smart devices with ease. With features like remote control, automation, voice commands, and live streaming, the Tapo app makes it easy to manage your home security, lighting, and other smart devices from anywhere.
Whether you want to set schedules, automate tasks, or monitor your home security, the Tapo app provides a simple and effective way to enhance your home automation experience. With its intuitive interface and powerful features, you can take full control of your smart devices and make your life smarter, easier, and more secure.
Updates